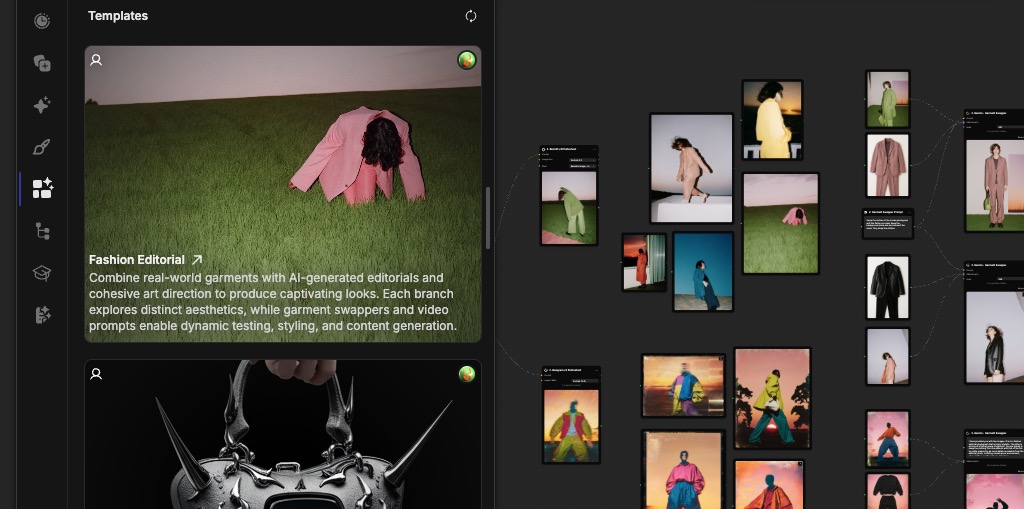
Templates
Templates are pre-built workflows designed to solve common problems and showcase best practices. They are the fastest way to get started with a new project and learn how Fuser works.

Why Use Templates?
- Learn Best Practices: See how experienced users build efficient and effective flows.
- Save Time: Start with a working solution instead of building from scratch.
- Discover New Ideas: Explore creative and powerful capabilities you might not have considered.
- Ensure Quality: Benefit from workflows that have already been tested and optimized.
- Learn Prompts: See how others use prompts to get the best results from AI models.
Using Templates
Finding and Using a Template
- Click the Templates tab in the left sidebar to open the library.
- Locate the template you want to use.
- Click the "Remix" button to create a copy in your workspace.
You can remix as many templates as you want in the same project. Simply click the "Remix" button for each template you want to use and they will be added to the canvas.
The only limitation, is that you can not remix a template in the project it was created in.
Customizing a Template
Templates are designed to be starting points. Once you open one, you should:
- Review the nodes to understand the workflow logic.
- Connect your API keys so that executable nodes can run.
- Replace sample inputs with your own content.
- Adjust parameters to fit your specific needs.
When customizing a template, test it with a simple input first to ensure you understand how it works before running it on more complex or costly tasks.
Creating Your Own Templates
When you build a workflow you're proud of, save it as a template to reuse later or share with the community.
- Finalize your workflow and click on the
Sharebutton in the top right corner of the canvas. - Turn on
Share a Linkto make your workflow public. - Once your workflow is public, you will see additional options appear in the share panel.
- Turn on
Allow Remixingto allow others to remix your workflow. - Give your template a name and a clear description.
- Most importantly, make sure to add a preview image to your template. You can either drag and drop an image from your Assets or Generations library or use the
Generate Previewbutton to generate a preview from your workflow.
We want to maintain a high quality of templates in the library, to esnure users have the most pleasant experience while learning how to take advantage of emerging AI models. To ensure this, we require a preview image, title, and description for all templates. Projects with no preview image, low quality or missing information will not be shown in the templates gallery.
Confirming a Template
Once you've created a template, you can confirm that it was successfully created by opening the templates gallery from the left sidebar. You should see your template in the list. You should also see a badge next to your project name in the left sidebar. Hovering over the badge should bring aup a tooltip with the text Public + Remixable.
You can always update your template by openning the original template project in the editor. Make your changes, add or modify the nodes and functionality, and if needed, update the preview image, title, and description in the share panel.
Template Design Principles
- Be Clear: Use descriptive names for your nodes and add text nodes to explain complex parts of the flow.
- Be Modular: Design your workflow so that it's easy to understand and modify.
- Be Robust: Think about potential issues and add fallback options where possible.
- Be Generous: Add helpful documentation and comments to your nodes to help others understand how to use them.
Template Privacy
When you share a template, it becomes publicly accessible. This has a few privacy implications that you should be aware of:
- Anyone who remixes your template can see all the node settings, generation history, and chat context that are present at the time of publishing your template.
- Past nodes and those deleted, including their generation history and chat context, are not visible to others.
- Private Style nodes used in the template can't be accessed by others, however the Style node (including the preview image and master prompt) will be visible to others.
Before sharing a template, review your nodes to ensure you're comfortable sharing their settings and chat history.
You can make your template public or private anytime and by toggling the Allow Remixing option in the share panel.
Important: When making previously public templates private, remember that users who already remixed your template before making it private will still have access to the version they remixed, as long as they have not deleted the nodes from the template.
What's Next?
Now that you know how to leverage templates, you can accelerate your creative process.
- Sharing & Collaboration - Share your custom templates with the world.
- Building Flows - Learn the fundamentals of building the flows that become templates.
- AI Providers - Understand the services that power templates.
- Interface Guide - Master the tools to build and use templates.