Building Flows
Flows are complete workflows made by connecting multiple nodes together. They are the heart of Fuser, turning individual AI operations into a cohesive, powerful process. Learn how to design, build, and optimize complex AI workflows that solve real problems.

What Are Flows?
A flow is a connected sequence of nodes that work together to accomplish a task. Think of flows as visual programs where data moves from left to right, being transformed and enhanced at each step.
Key Characteristics
- Data-driven: Execution follows the path of data from one node to the next.
- Automatic: Changes to one node automatically trigger updates in all connected nodes downstream.
- Visual: The entire process is laid out on the canvas, making it easy to understand and debug.
- Modular: Flows are built from individual nodes, which can be combined in limitless ways.
Flow Execution
Currently, Fuser requires you to manually execute individual nodes. We are working on a more automatic execution model that allows you to execute the entire flow at once, but for now, you need to manually execute nodes to get the desired generation.
If you are simultaneously executing multiple nodes, you may see some nodes execute out of order. This is because Fuser is not yet able to execute nodes in parallel. We are working on this, but for now, you need to manually execute nodes to get the desired generation.
Execution Considerations
- Dependency Analysis: Fuser identifies which nodes depend on others and will automatically resolve dependencies. Remember, data always flows from left to right.
- Automatic Updates: When an input changes or a node's parameters are adjusted, all downstream nodes that depend on that output will be updated automatically.
- Parallel Processing: You can execute multiple nodes at once by selecting them and pressing the button in the node toolbar or using the primary toolbar at the bottom of the canvas.
Nodes resolve their dependencies the moment they are executed. Let's say you want to execute a node Node B that depends on the output of another node Node A. If you execute Node B first, and then immediately execute Node A, Node B will not use the updated output of Node A, because Node A was not fully executed. The video below shows this in action.
Common Flow Patterns
Understanding these common patterns will help you design more effective and efficient flows.
Linear Pipeline
A sequential process where each step builds on the last. This is the most common pattern.
- Pattern:
Node A → Node B → Node C - Use Case: A content creation pipeline, like turning a prompt into an enhanced image.
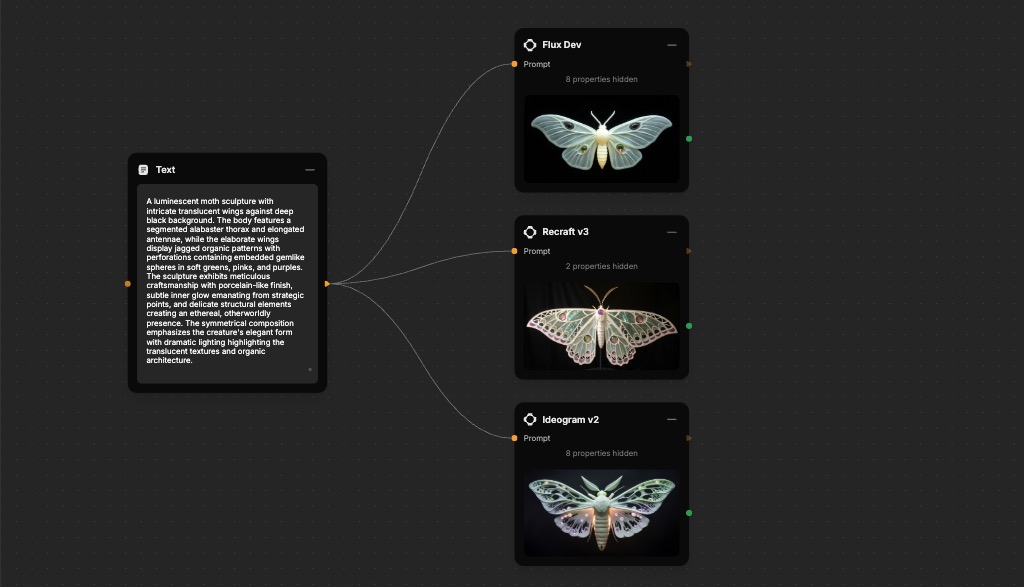
One-to-Many
Use a single input to create multiple, parallel outputs.
- Pattern:
Node A → [Node B, Node C, Node D] - Use Case: A/B testing different prompts or applying different styles to the same source image.
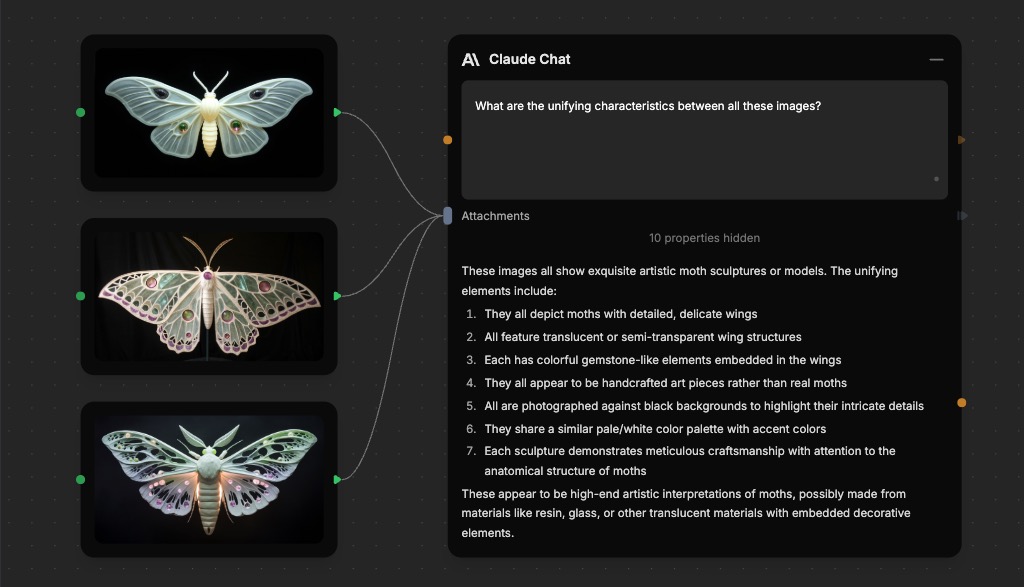
Many-to-One
Combine multiple inputs into a single node that can process them as a batch.
- Pattern:
[Node A, Node B, Node C] → Node D - Use Case: Analyze multiple images at once to derive their common characteristics.
Combined Patterns
By combining these patterns, you can build sophisticated workflows tailored to complex tasks. This approach allows you to tackle many parts of a project within a single canvas, managing everything from copy and images to videos and 3D assets. You can start from a single inception point and then branch out to explore different creative possibilities and ideas in parallel.
For example, you might use a one-to-many pattern to generate several variations of an image from a single prompt, then a many-to-one pattern to have a vision model analyze and select the best option, while another branch generates marketing copy based on the initial concept.
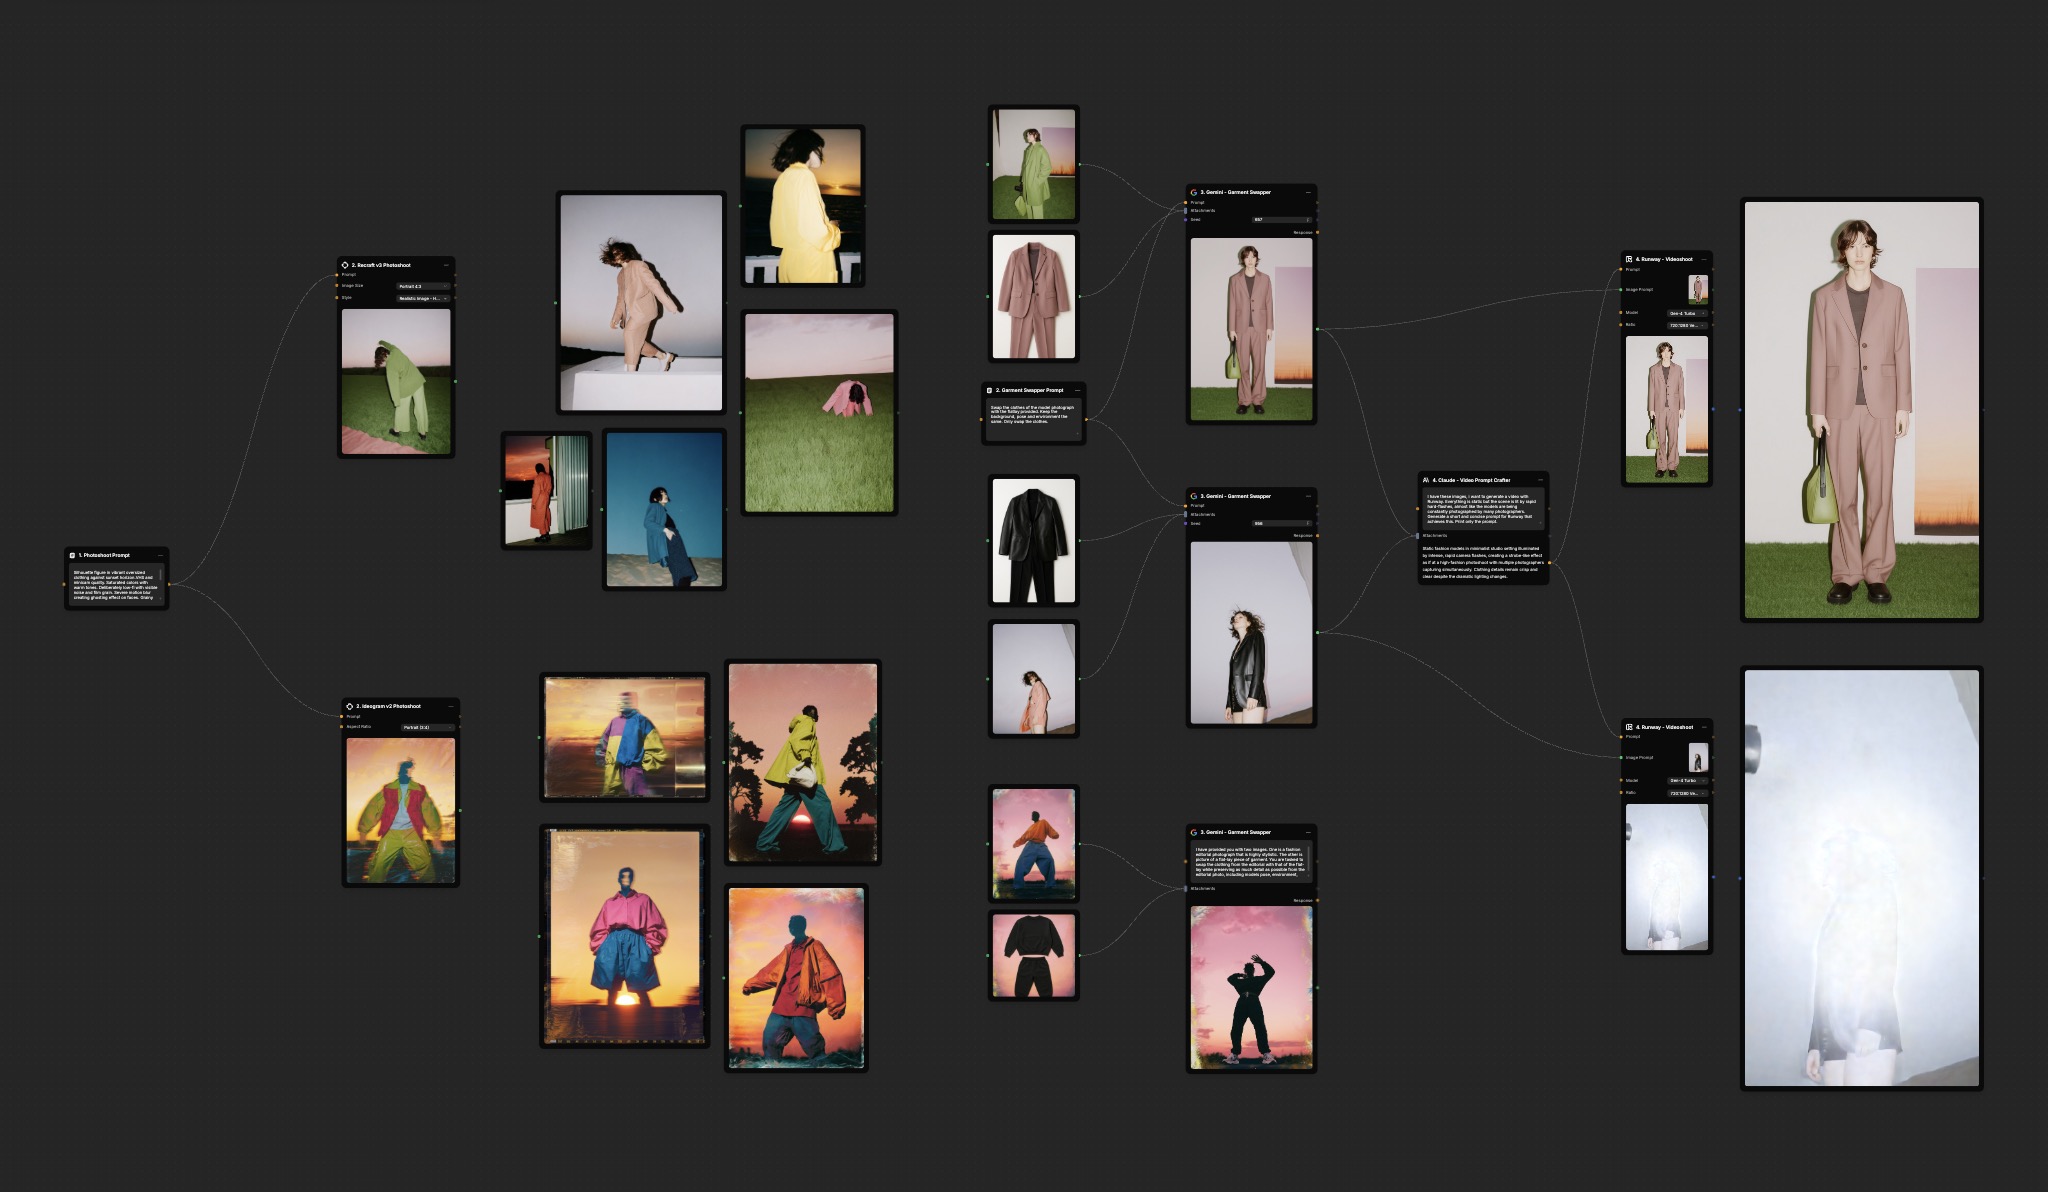
In the example above, the flow starts with a single prompt to generate two different styles of photoshoots, demonstrating a one-to-many pattern for creative exploration. Selected images are then combined with various clothing items to create new outfits, a form of many-to-one processing. Finally, these new images are fed into a linear pipeline to generate video animations. This complex workflow lives on a single canvas, streamlining a creative project from initial concept to final photo and video deliverables.
Building Effective Flows
Planning Your Flow
- Define the Goal: What is the final output you want to create? What are your starting inputs?
- Break It Down: Identify the discrete steps needed to get from input to output. Each step is likely a node.
- Choose Your Nodes: Select the right AI models and utility nodes for each step, considering the balance of cost, speed, and quality.
Flow Design Principles
- Left-to-Right Data Flow: Always arrange your nodes so that data flows consistently from left to right. This makes your workflow intuitive to read.
- Logical Grouping: Place related nodes together. Create distinct areas for input preparation, core processing, and output exploration.
- Clear Naming: Rename your nodes to be descriptive.
Product Descriptionis much clearer thanText. Double-click a node's title to rename it.
Organize your canvas for clarity. A well-organized flow is easier to understand, debug, and share.
Advanced Flow Techniques
Conditional Logic
While Fuser doesn't have explicit if/else nodes, you can create conditional logic by building different branches and manually choosing which one to execute for the final output.
Batch Processing
Process multiple items at once by connecting them to an input socket that accepts multiple properties . This is highly efficient for processing large numbers of items.
Creating Templates
If you create a flow you use often, save it as a template. This allows you to reuse successful patterns quickly.
- Build and test your flow.
- Add text nodes to document how it works.
- In the Share Panel, choose "Allow Remixing".
Cost and Speed
- Use faster, cheaper models during development (e.g., Flux Dev or OpenRouter's free models).
- Switch to higher-quality, more expensive models for final production runs.
- Design flows with parallel branches to run independent operations simultaneously, saving time.
What's Next?
Now that you understand the principles of building flows:
- Sockets & Connections - Learn the details of how data moves between nodes.
- Templates - Explore pre-built flows to see these patterns in action.
- AI Providers - Discover the services that power your flows.
- Sharing & Collaboration - Share your creations with others.