Core Concepts
Understanding these fundamental concepts will help you master Fuser and build powerful AI workflows.
The Canvas
The infinite canvas is your workspace in Fuser. Think of it as a limitless drawing board where you can:
- Place nodes anywhere you want
- Organize workflows spatially
- Zoom and pan to navigate large projects
- Group related functionality by positioning
Navigation Basics
- Pan: Click and drag on empty space
- Alternatively, use your mouse wheel to pan vertically, or hold
Shiftwhile scrolling to pan horizontally.
- Alternatively, use your mouse wheel to pan vertically, or hold
- Zoom:
⌘/Ctrl+Mouse wheelor pinch on trackpad - Fit to View: Double-click on empty space to fit the canvas to the view
- Focus Node: Double-click on a node to focus on it
Nodes: The Building Blocks
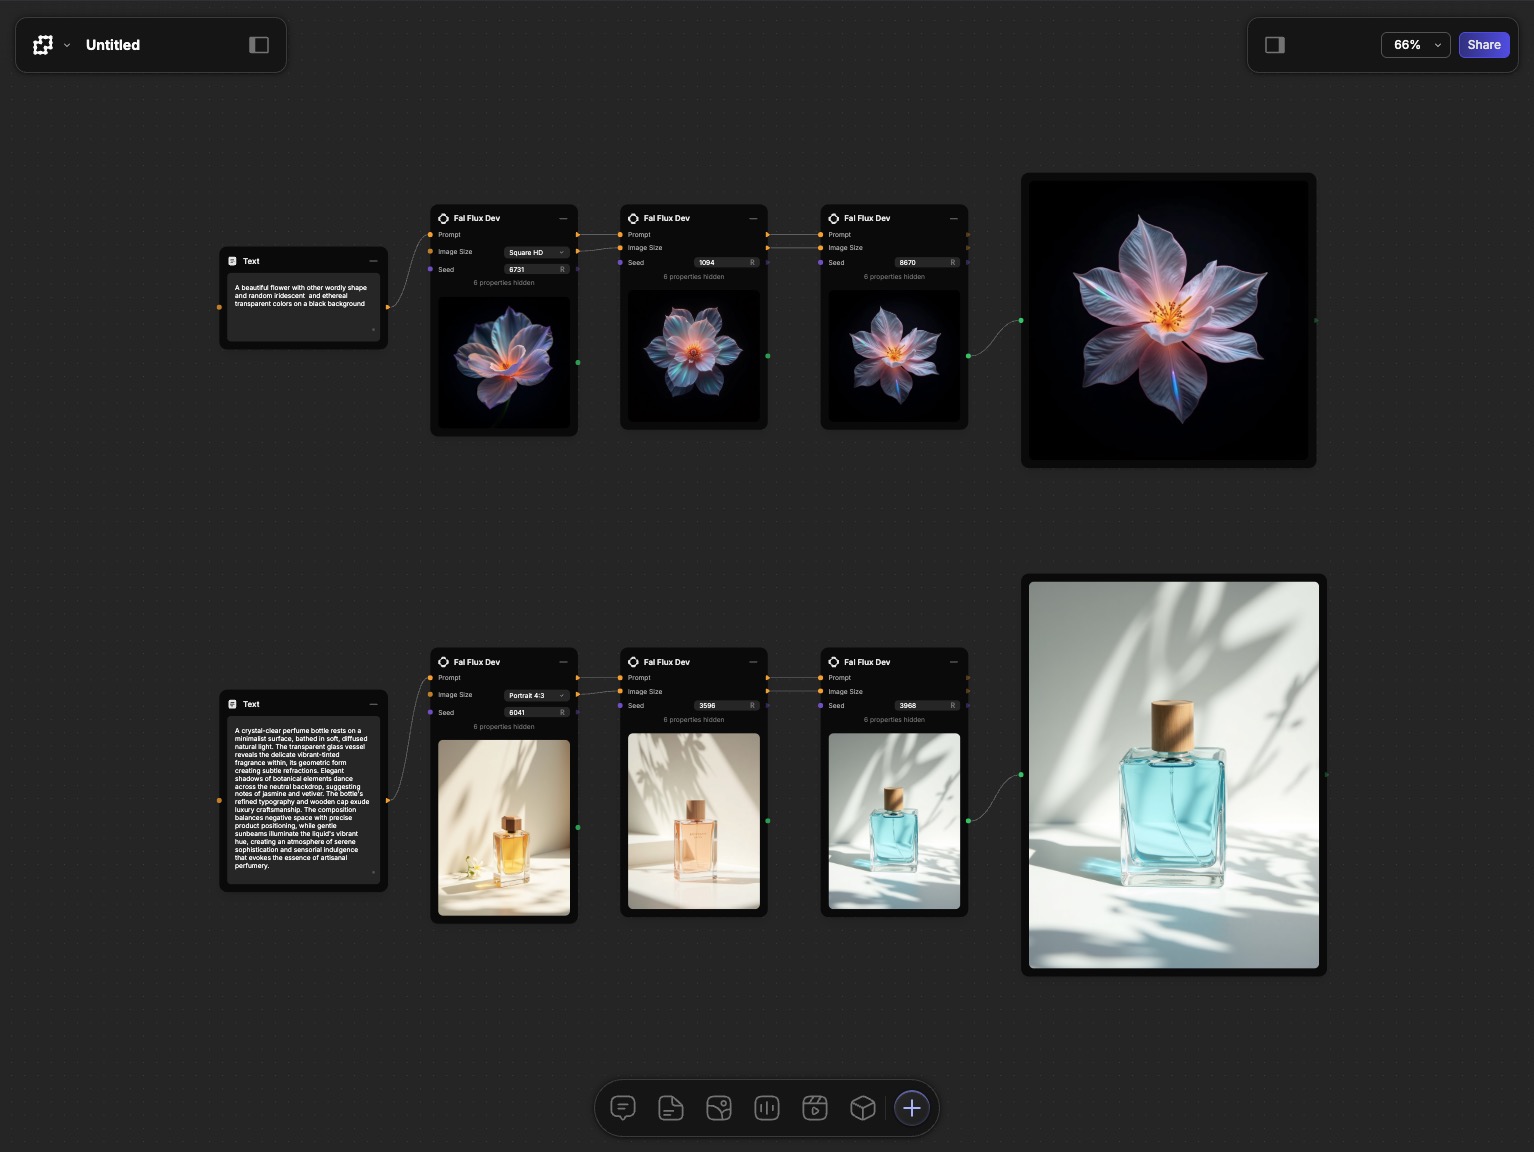
Nodes are the building blocks of Fuser, each representing a step in your workflow. Nodes integrate AI models, tools, or content to power your creative process. They are the fundamental units of functionality in Fuser. Every node represents either data or an operation.
Node Anatomy
Each node consists of:
- Header: Shows the provider icon and node title.
- Properties: Internal settings and parameters.
- Sockets: Connection points for node properties. You can connect sockets by dragging and dropping from one socket to another.
You can rename the node by double-clicking on the title and typing a new title.
Types of Nodes
Primitive Nodes
Primitive nodes are used to store and display content:
- Text - Store text, prompts, and strings
- Image - Display and store images
- Video - Handle video files
- Audio - Work with audio content
- Mesh - 3D objects and models
Executable Nodes
Executable nodes are used to perform AI operations by connecting to a provider and processing data that is passed through them:
- Chat Models - Chat with AI models like OpenAI and Anthropic.
- Image Generators - Generate images using AI models like Flux and Ideogram.
- Video Generators - Generate videos using AI models like Runway and Luma.
- Audio Generators - Generate audio using AI models like text-to-speech, music generation.
- 3D Generators - Generate 3D objects using AI models like Rodin and Hunyuan.
You can find more information and learn more about nodes in the Understanding Nodes section.
Properties, Sockets, and Edges
Properties
Every node has one or more Properties that control the node's behavior and provide the necessary data for a node to function. These include model selection to choose which AI model to use, aspect ratio for image generation, duration for videos, and other parameters that are specific to the node.
Sockets
Sockets are the colored circles on the sides of nodes that allow data from one property to flow to another node's property. You can think of them as "ports", passing and receiving data.
Input sockets receive property data from other nodes and are on the left side of the node. Output sockets send data to other properties and are on the right side. This allows you to read the data flow from left to right, similar to how you read a sentence.
Sockets are indicated by their color, which corresponds to the type of data they support:
- Text: Text and strings
- Image: Images
- Video: Video
- Audio: Audio
- 3D: 3D objects
- Style: Style data
- Number: For numeric values
- Generic: Generic data
You can only connect sockets of compatible types. The colors help you see what connects to what!
Edges: Creating Connections
Edges are the lines connecting nodes, showing how data flows through your workflow.
- Click and drag from an output socket (right side)
- Drag to empty space to see compatible nodes in Quick Connect
- Or drag directly to a compatible input socket of another node
You can find more information and learn more about sockets and edges in the Sockets & Connections section.
Flows: Complete Workflows
A flow is a connected set of nodes that work together to accomplish a task. Flows are the complete structure that bring everything together, guiding your project from start to finish. They turn individual steps into a cohesive, actionable end-to-end process.

Data always flows from left to right. It comes in from the left, goes through the node and is processed, and then goes out to the right and passed to the next node.
You can find more information and learn more about flows in the Building Flows section.
Providers: AI Services
Providers are the AI services that power executable nodes, offering a range of capabilities including GPT models from OpenAI, Claude models from Anthropic, image, video, and audio generation from Fal, access to over 300 models from OpenRouter, and Gemini models from Google.
These providers bring numerous benefits, such as access to best-in-class models for each task, direct API access for the fastest performance, transparent pricing that only charges provider costs, and the flexibility to switch providers easily.
Key Principles
- Visual Data Flow: See exactly how your data moves through the workflow. No hidden steps or black boxes.
- Modular Design: Each node does one thing well. Combine nodes to create complex behaviors.
- Real-time Updates: Changes propagate through your workflow automatically. See results as you build.
- Reusable Components: Save and share node combinations. Build a library of useful workflows.
What's Next?
Now that you understand the basics:
- Canvas Navigation - Master moving around your workspace
- Understanding Nodes - Deep dive into node types and usage
- Sockets & Connections - Learn advanced connection techniques
- Building Flows - Create complex multi-step workflows
The best way to learn Fuser is by experimenting! Try connecting different nodes and see what happens. You can always undo with ⌘/Ctrl+Z.